G Router IPv6 Setup: A Comprehensive Guide
As the world transitions to IPv6 to address the depletion of IPv4 addresses, understanding how to configure IPv6 on your router has become essential. Poplar router brands offer distinct configuration methods and interfaces, which can vary significantly. In this article, we will focus on the G Router IPv6 setup, providing a step-by-step guide to help you configure your G Router for IPv6 connectivity.
Benefits of Configuring IPv6 on Your Router
Configuring IPv6 on your router offers several benefits, including eliminating the need for NAT (Network Address Translation), a greater number of available addresses, improvements in routing and network security, and reduced IP address management complexity. With IPv6, you can enjoy faster speeds, improved connectivity, and enhanced network security.
Enabling IPv6 on Your G Router
Enabling IPv6 on your G Router is a straightforward process that can be completed in a few steps. Here's a step-by-step guide to help you get started:
- Log in to your G Router using the default IP address (usually 192.168.1.1 or 192.168.0.1) and the login credentials provided by your ISP.
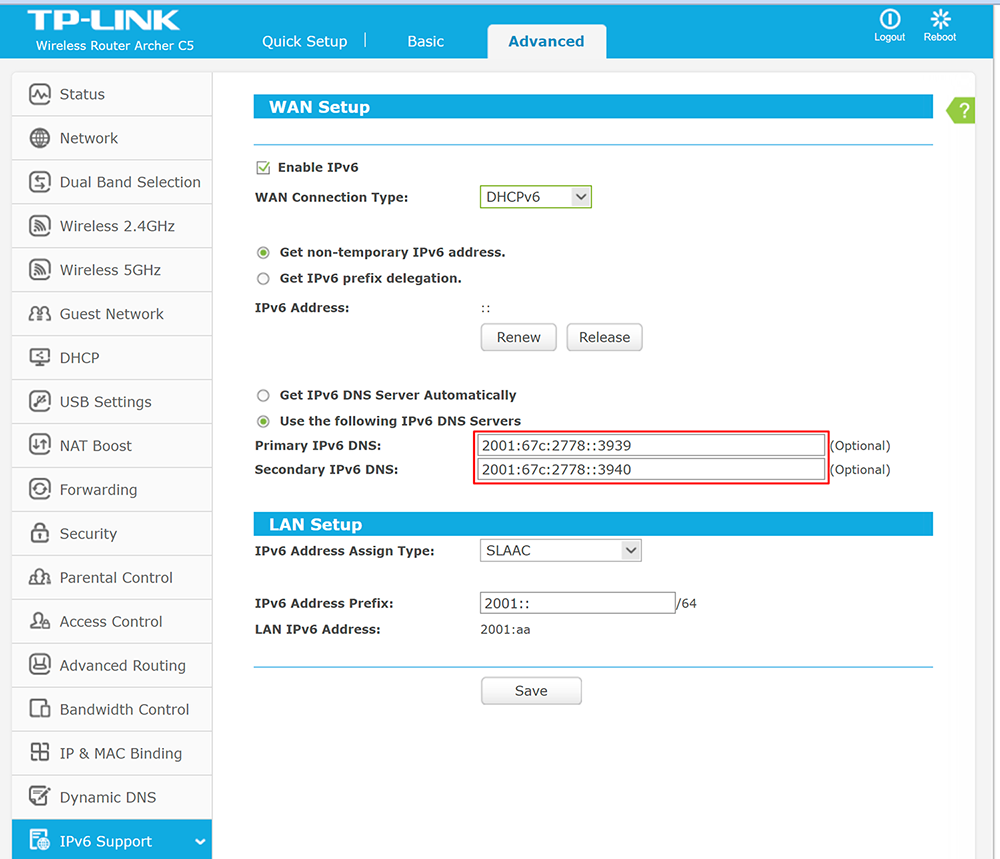
- Navigate to the Advanced Settings or IPv6 section, depending on your router's interface.
- Enable the IPv6 feature and select the desired IPv6 configuration mode (e.g., Stateless, Stateful, or Mixed).
- Configure the IPv6 address, subnet mask, and default gateway as provided by your ISP.
- Save the changes and restart your router to apply the new settings.
 Self-Install Kit")


")


![[IPv6] How to set up IPv6 in ASUS router?](https://community.cisco.com/legacyfs/online/legacy/0/7/5/135570-IPv6%20Setup.JPG "[IPv6] How to set up IPv6 in ASUS router?")


