D-Link Router Setup Wizard: A Comprehensive Guide
Setting up a D-Link router can seem like a daunting task, but with the right guidance, you can have a secure and efficient home network in no time. The D-Link Router Setup Wizard is designed to walk you through a step-by-step process to configure your new router and connect to the Internet. In this article, we'll take a closer look at the setup process and provide you with a comprehensive guide to getting started.
What is the D-Link Router Setup Wizard?
The D-Link Router Setup Wizard is a built-in tool that guides you through the setup process of your D-Link router. It's a user-friendly interface that detects your Internet connection type and walks you through the configuration process. The wizard is designed to make setup easy and hassle-free, even for those who are new to networking.
Step-by-Step Setup Process
Here's a step-by-step guide to setting up your D-Link router using the Setup Wizard:
- Step 1: Connect your modem to the router using an Ethernet cable.
- Step 2: Connect a computer to the router using an Ethernet cable.
- Step 3: Power on the router and wait for it to boot up.
- Step 4: Open a web browser and type in the default IP address of your router (usually 192.168.0.1 or 192.168.1.1).
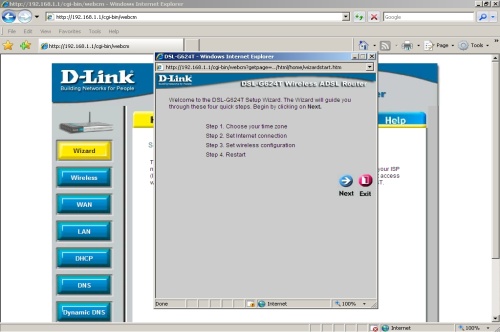
- Step 5: You will be prompted with the D-Link Quick Router Setup Wizard. Click Next to begin.
- Step 6: Select your language and click Start to continue.
- Step 7: The wizard will detect your Internet connection type and guide you through the configuration process.
- Step 8: Follow the on-screen instructions to complete the setup process.


